- Key takeaways
- Part 1. What is a lawn mower battery?
- Part 2. Why do you need to remove a lawn mower battery?
- Part 3. What tools do you need to remove a lawn mower battery?
- Part 4. Where is the battery located on a lawn mower?
- Part 5. How to remove a lawn mower battery step by step
- Part 6. How to remove a lithium-ion battery from an electric lawn mower
- Part 7. Common problems when removing a lawn mower battery
- Part 8. How to test a lawn mower battery for a bad cell
- Part 9. How to clean lawn mower battery terminals
- Part 10. How to choose a replacement lawn mower battery
- Part 11. How to install a new lawn mower battery
- Part 12. How to store a lawn mower battery
- Part 13. When should you replace a lawn mower battery?
- Part 14. How to safely dispose of an old lawn mower battery
- Part 15. FAQs about removing lawn mower batteries
To remove a lawn mower battery safely, turn off the mower, remove the key, disconnect the negative cable first, and then disconnect the positive cable. Remove the battery bracket and lift the battery out while keeping it upright.
The exact process depends on the mower type. Riding mowers often use a 12V lead-acid battery, while cordless electric mowers use removable lithium-ion battery packs.
Key takeaways
- Turn off the mower and remove the ignition or safety key.
- Disconnect the negative terminal first.
- Disconnect the positive terminal second.
- Connect the terminals in the reverse order during installation.
- Keep lead-acid batteries upright to prevent leaks.
- Do not open or repair a lithium-ion mower battery pack.
- Check the mower manual before removing covers or service connectors.
Part 1. What is a lawn mower battery?
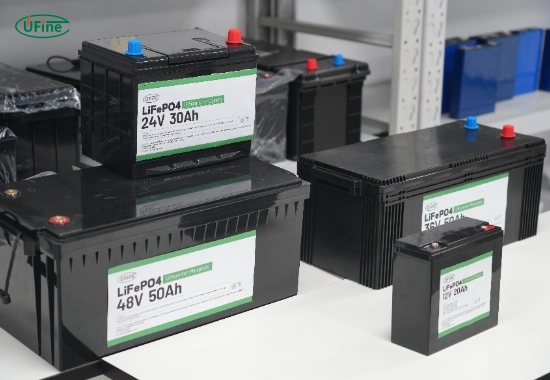
A lawn mower battery supplies power to the mower’s starting and electrical systems. Riding mowers, lawn tractors, zero-turn mowers, and electric-start push mowers often use a 12V starter battery.
Cordless electric mowers use a larger lithium-ion battery pack. This battery powers the motor rather than only starting the engine.
| Battery type | Common mower | Removal method |
|---|---|---|
| Lead-acid or AGM battery | Riding mower, lawn tractor, zero-turn mower | Disconnect cables and remove the hold-down bracket |
| Small electric-start battery | Gas push mower | Disconnect the plug or small terminals |
| Removable lithium-ion pack | Cordless push mower | Press the release latch and slide out the pack |
| Fixed lithium battery system | Electric riding mower | Follow the manufacturer’s service procedure |
Part 2. Why do you need to remove a lawn mower battery?
You may need to remove the battery for the following reasons:
- Replacement: The battery no longer holds a charge.
- Charging: The battery needs an external charger.
- Winter storage: Indoor storage can reduce cold-weather damage.
- Terminal cleaning: Corrosion can block current flow.
- Battery testing: Removal makes voltage and load testing easier.
- Electrical repair: Disconnecting the battery isolates the electrical system.
- Mower recycling: Batteries must be removed before mower disposal.
Part 3. What tools do you need to remove a lawn mower battery?
Most riding mower batteries can be removed with basic tools.
- Safety glasses
- Protective gloves
- Wrench or socket set
- Screwdriver
- Clean cloth
- Terminal brush
- Plastic battery tray
- Digital multimeter
- Battery load tester, if needed
Common terminal fasteners include 10mm, 7/16-inch, and 1/2-inch nuts. Use the correct size to avoid damaging the bolt.
Safety precautions
- Work in a dry and well-ventilated area.
- Keep flames, cigarettes, and sparks away.
- Remove rings, watches, and metal jewelry.
- Do not place tools on top of the battery.
- Do not touch both terminals with the same tool.
- Do not handle a battery that is swollen, leaking, cracked, or hot.
Part 4. Where is the battery located on a lawn mower?
The battery location depends on the mower design.
| Mower type | Common battery location |
|---|---|
| Riding mower | Under the seat or beneath the hood |
| Lawn tractor | Under the hood or behind the engine compartment |
| Zero-turn mower | Under or behind the operator’s seat |
| Electric-start push mower | Near the handle or rear housing |
| Cordless electric mower | Inside the top or rear battery bay |
Check the owner’s manual if the battery is not visible. Do not remove sealed service panels from an electric riding mower unless the manufacturer allows it.
Part 5. How to remove a lawn mower battery step by step
The following steps explain how to remove a 12V battery from a riding mower, lawn tractor, or zero-turn mower.
Park the mower safely
- Park on a flat and dry surface.
- Disengage the mower blades.
- Set the parking brake.
- Turn off the engine.
- Remove the ignition key.
- Wait for the engine to cool.
If the mower is connected to a charger, unplug the charger before working on the battery.
Disconnect the spark plug
Remove the spark plug wire if the battery is near the engine or moving parts. This helps prevent accidental starting.
For an electric mower, remove the safety key and all removable battery packs.
Open the battery compartment
Lift the seat, open the hood, or remove the battery cover. Keep screws and clips in a safe place.
Take a photo before disconnecting the battery. This helps record the terminal direction, bracket position, and cable routing.
Identify the battery terminals
The battery has two terminals:
- Negative terminal: Marked with a minus sign (-), usually with a black cable.
- Positive terminal: Marked with a plus sign (+), usually with a red cable.
Always check the terminal symbols. Do not depend only on cable color.
Disconnect the negative cable first
Use a wrench or socket to loosen the negative terminal bolt. Remove the cable and move it away from the battery.
Disconnecting the negative terminal first reduces the risk of a short circuit between the positive terminal and the mower frame.
The Husqvarna battery replacement procedure also instructs users to remove the black negative cable before the red positive cable.
Disconnect the positive cable
Move the red terminal cover aside. Loosen the positive terminal bolt and remove the cable.
Keep the wrench away from the mower frame and other metal parts.
Remove the battery hold-down
Remove the strap, clamp, bracket, or crossbar that holds the battery in place.
Common hold-down systems include:
- Rubber straps
- Metal brackets
- Plastic clamps
- J-bolts
- Crossbars
Lift out the battery
Grip the battery with both hands and lift it straight up. Keep it upright during removal.
Do not lift the battery by its cables or terminals. Place it in a stable plastic tray after removal.
Part 6. How to remove a lithium-ion battery from an electric lawn mower
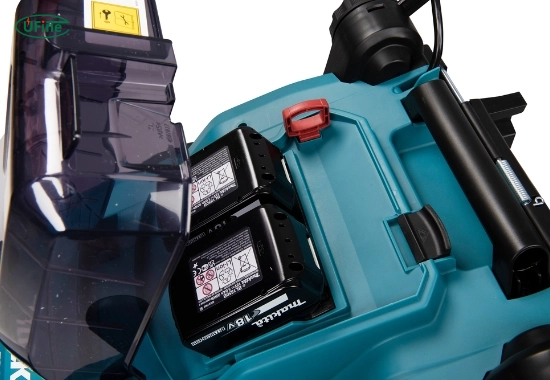
A removable lithium-ion battery does not normally use exposed cable terminals.
- Release the blade and drive controls.
- Turn off the mower.
- Remove the safety key.
- Wait until the blade stops.
- Open the battery compartment.
- Press the battery release button.
- Hold the battery by its handle.
- Slide or lift the battery out.
Do not use a screwdriver or metal tool to force out a stuck battery.
Stop using the battery if it is swollen, cracked, leaking, smoking, or very hot. Do not open or repair the pack.
Part 7. Common problems when removing a lawn mower battery
| Problem | Possible cause | What to do |
|---|---|---|
| Terminal bolt will not turn | Corrosion or damaged fastener | Use the correct socket and an approved terminal cleaner |
| Cable is stuck on the post | Heavy corrosion | Twist the clamp gently or use a battery terminal puller |
| Battery will not lift out | Hidden strap or bracket | Check all sides before applying force |
| White or green corrosion | Moisture, acid vapor, or a loose terminal | Clean the terminals and inspect the charging system |
| Lithium battery is stuck | Damaged latch, dirt, heat, or swelling | Do not pry it out; contact an approved service center |
Part 8. How to test a lawn mower battery for a bad cell
Battery testing helps you decide whether the battery needs charging or replacement.
Inspect the battery
Do not test a battery with cracks, leaks, swelling, damaged terminals, or signs of overheating.
Charge the battery
Use a charger that matches the battery voltage and chemistry. A 12V lead-acid mower battery requires a compatible 12V charger.
Measure the resting voltage
Set a multimeter to DC voltage. Connect the red probe to positive and the black probe to negative.
| Battery voltage | General condition |
|---|---|
| 12.6–12.8V | Fully charged |
| About 12.4V | Partially charged |
| Below 12.2V | Low charge or possible battery damage |
| Near 10.5V after charging | Possible failed cell |
Perform a load test
A load test measures how the battery performs under starting current. Follow the tester instructions and compare the result with the battery rating.
A battery that shows normal voltage but drops quickly under load may have high internal resistance or a damaged cell.
Testing a lithium-ion mower battery
Do not open the pack or probe internal cells. Use the approved charger and check the battery status lights, error codes, runtime, temperature, and physical condition.
Part 9. How to clean lawn mower battery terminals
Corroded terminals can cause slow starting, clicking sounds, voltage loss, and charging problems.
Cleaning lead-acid battery terminals
- Wear gloves and safety glasses.
- Place the battery in a ventilated area.
- Mix a small amount of baking soda with water.
- Apply the mixture to external corrosion.
- Scrub the terminals with a terminal brush.
- Wipe the area with clean water.
- Dry the battery completely.
- Apply a thin layer of terminal protector.
Do not allow baking soda solution to enter the battery vents or cells.
Cleaning lithium-ion battery contacts
Use a clean and dry cloth. Do not spray water or cleaning liquid into the battery contacts.
Part 10. How to choose a replacement lawn mower battery
Check more than the battery size when replacing a lawn mower battery.
| Specification | What to check |
|---|---|
| Voltage | Match the mower’s required voltage |
| Chemistry | Lead-acid, AGM, LiFePO4, or lithium-ion |
| Dimensions | Confirm length, width, height, and terminal clearance |
| Terminal position | Match the positive and negative terminal layout |
| Starting current | Check the required CCA or starting current |
| Capacity | Compare amp-hours or watt-hours |
| Connector | Confirm plug type, pinout, and communication requirements |
A lithium battery is not always a direct replacement for a lead-acid battery. The voltage, charging system, temperature range, starting current, terminal layout, and battery management system must be compatible.
Part 11. How to install a new lawn mower battery
- Clean the battery tray.
- Place the new battery in the correct direction.
- Install the battery bracket or strap.
- Connect the positive terminal first.
- Connect the negative terminal second.
- Tighten the terminal bolts.
- Install the terminal covers.
- Check that the cables do not touch moving or hot parts.
- Reconnect the spark plug wire.
- Close the battery compartment.
- Start the mower and test the system.
Do not over-tighten the terminal bolts. Too much force can damage the terminal or battery case.
Part 12. How to store a lawn mower battery
Lead-acid or AGM battery storage
- Charge the battery before storage.
- Keep it upright.
- Store it in a cool and dry area.
- Keep it away from flames and fuel.
- Check the charge every 30–60 days.
- Use a compatible smart maintainer if allowed.
Lithium-ion battery storage
- Remove the battery from the mower and charger.
- Store it at the charge level recommended by the manufacturer.
- Do not store it fully discharged.
- Protect the contacts from metal objects.
- Keep it away from high heat and direct sunlight.
- Do not use a lead-acid battery charger.
Part 13. When should you replace a lawn mower battery?
Replace the battery when it shows one or more of these signs:
- The mower cranks slowly.
- The starter only clicks.
- The battery loses charge quickly.
- The voltage drops sharply during a load test.
- The battery case is cracked or swollen.
- The battery is leaking.
- The terminals are loose or damaged.
- The lithium battery shows repeated error codes.
- Electric mower runtime has dropped sharply.
Also inspect the cables, starter, charger, charging system, and electrical connections. A new battery will not fix a fault elsewhere in the mower.
Part 14. How to safely dispose of an old lawn mower battery
Do not place a lawn mower battery in household trash or a curbside recycling bin.
Lead-acid batteries
- Keep the battery upright.
- Transport it in a plastic tray.
- Return it to a battery retailer or auto parts store.
- Use a household hazardous waste facility if needed.
Lithium-ion batteries
- Do not crush, puncture, or open the battery.
- Protect exposed terminals with non-conductive tape.
- Use a specialist battery recycling center.
- Tell the recycling center if the battery is swollen or damaged.
The US EPA battery recycling guidance explains how to handle used lead-acid batteries. The EPA also provides separate guidance for used lithium-ion batteries.
Part 15. FAQs about removing lawn mower batteries
Can I remove a lawn mower battery without tools?
A removable lithium-ion pack may not need tools. A 12V riding mower battery usually requires a wrench or socket.
What happens if I disconnect the positive cable first?
Your tool may create a short circuit if it touches the mower frame. Disconnect the negative cable first.
How often should I replace my lawn mower battery?
Most mower batteries last about three to five years. Replace the battery when it cannot hold a charge or fails a load test.
Is it safe to charge the battery while still connected to the mower?
Only use an approved onboard charging port. Otherwise, disconnect or remove the battery before charging.
What are the signs of a failing battery?
Common signs include slow cranking, clicking, dim lights, short runtime, repeated discharge, and charger error codes.
Related Tags:

More Articles
Dead Battery or Device Failure? How to Find the Cause
Think your device is broken? Learn how to tell if the problem comes from battery aging or hardware failure before replacing your electronics.
Why iPhone Duo Uses Two Batteries: The Engineering Behind Foldable Phone Power
Why do foldable phones need two batteries? Explore the engineering challenges behind iPhone Duo’s dual-battery architecture and future battery trends.
Solid-State Batteries: 3 Myths You Need to Know
Solid-state batteries promise safer EVs and longer range, but the reality is more complex. Discover the challenges behind this next-gen technology.
Battery Capacity vs Discharge Rate: The Choice Engineers Face
Higher capacity or higher discharge rate? Learn how to choose the right LiPo battery for longer runtime, stable power output, and better device performance.
Battery Cable Size Guide: Choose the Right Wire Fast
Not sure what battery cable size you need? Learn how to select the right wire gauge, terminal size, and cable for safer, more efficient battery systems.