- Key Takeaways
- Part 1. How to design an 18650 battery pack (before you build)
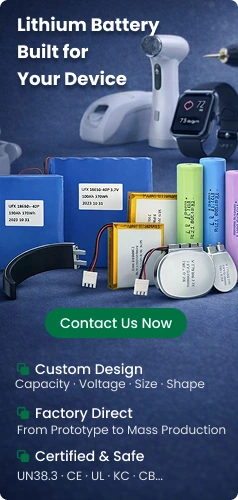
- Part 2. Components & tools for DIY 18650 battery pack
- Part 3. Choosing the right 18650 cells
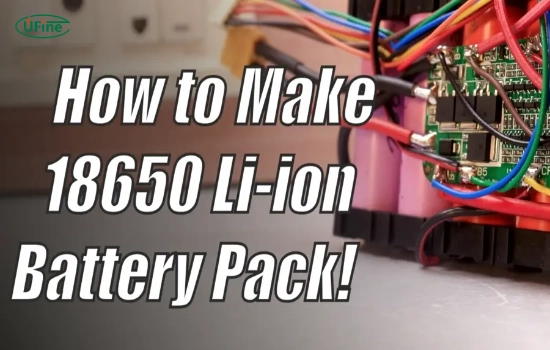
- Part 4. Step-by-step: Assembling a DIY 18650 battery pack
- Part 5. 18650 battery pack testing: Voltage, capacity and safety checks
- Part 6. Practical applications of DIY 18650 battery packs
- Part 7. DIY 18650 battery pack FAQs (build, safety and lifespan)
Building a DIY 18650 battery pack is a practical way to power devices like e-bikes, power tools, and portable systems. This guide explains not only how to build a rechargeable battery pack, but also how to design it correctly for safety, performance, and long-term reliability.
For ready-made solutions or reference designs, see our
👉 18650 battery pack solutions
Key Takeaways
- A successful 18650 battery pack builder project starts with accurate load, voltage, and capacity calculations.
- Cell selection (capacity + discharge rate) directly determines safety and lifespan.
- Always use a BMS (Battery Management System) to prevent overcharge, over-discharge, and imbalance.
- Spot welding is preferred over soldering to avoid heat damage to cells.
- Testing (capacity + voltage balance) is critical before real-world use.
- Poor design or mismatched cells is the #1 cause of DIY pack failure.
Part 1. How to design an 18650 battery pack (before you build)
Before starting your diy 18650 battery pack, define these key parameters:
1. Determine Load Current
- Measure continuous current and peak current
- Example:
- LED system: 1–3A
- Power tools: 15–30A+
2. Calculate Required Capacity
Use:
Capacity (Ah) = Current (A) × Runtime (hours)
This defines how many cells you need in parallel.
3. Define Voltage (Series Configuration)
- 1 cell = 3.7V nominal
- Example:
- 3S = 11.1V
- 4S = 14.8V
4. Determine Cell Count (Series × Parallel)
| Configuration | Purpose | Example |
|---|---|---|
| Series (S) | Increase voltage | 4S = 14.8V |
| Parallel (P) | Increase capacity & current | 2P = 2× capacity |
👉 Example: 4S2P pack = 8 cells total
Part 2. Components & tools for DIY 18650 battery pack
1. Core Components
- 18650 Cells (matched, same batch recommended)
- BMS (Battery Management System)
- Nickel strips (for connections)
- Battery holder (optional)
- Insulation materials (fish paper, heat shrink)
- Protective casing
2. Essential Tools
- Spot welder (recommended for pack builder 18650)
- Multimeter
- Wire cutters & strippers
- Heat gun
- Battery charger
👉 For safety standards, refer to NFPA energy storage safety guidelines
Part 3. Choosing the right 18650 cells
Cell quality defines pack performance. Avoid mixing brands or old/new cells.
1. Capacity vs Discharge Trade-off
| Type | Typical Use |
|---|---|
| High capacity (3000mAh+) | Low-power devices |
| High discharge (20A+) | Tools, e-mobility |
2. Key Selection Criteria
- Same brand and model
- Same production batch
- Verified datasheet
- Low internal resistance
- Certified (UL, IEC)
3. Common Mistake
Using fake or rewrapped cells → leads to:
- Overheating
- Capacity mismatch
- Early failure
Part 4. Step-by-step: Assembling a DIY 18650 battery pack
Arrange Cells (Series & Parallel)
Align cells correctly (polarity matters)
Use holders or templates for stability
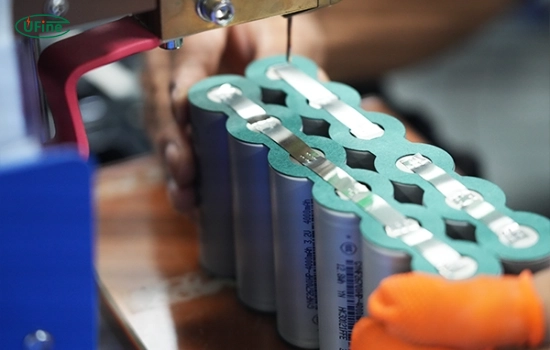
Spot Welding (Critical Step)
Use nickel strips (not steel)
Apply short pulses (milliseconds)
Avoid overheating cells
👉 This is why most professional 18650 battery pack builders avoid soldering directly on cells.
Install the BMS
Connect balance wires to each series group
Match BMS specs:
Voltage (e.g., 4S BMS for 4S pack)
Current rating
BMS protects against:
Overcharge
Over-discharge
Short circuit
Cell imbalance
Wiring & Insulation
Use correct wire gauge (based on current)
Add insulation:
Fish paper rings
Heat shrink
Keep layout clean and secure
Add Casing / Enclosure
Plastic: lightweight, low cost
Aluminum: better heat dissipation
For high-power packs:
Add ventilation or heat sinks
Part 5. 18650 battery pack testing: Voltage, capacity and safety checks
1. Voltage Check
- Measure total pack voltage
- Check each series group
👉 All groups should be within ±0.05V
2. Capacity Test
- Fully charge pack
- Discharge using tester
- Compare actual vs expected capacity
3. Load Testing
- Simulate real usage
- Check:
- Voltage drop
- Heat generation
4. Troubleshooting
| Issue | Possible Cause |
|---|---|
| Low capacity | Weak cells / bad weld |
| Voltage imbalance | Faulty BMS wiring |
| Overheating | High internal resistance |
Part 6. Practical applications of DIY 18650 battery packs
Common use cases:
- E-bikes & scooters
- Solar energy storage
- Power tools
- Portable power stations
- DIY electronics
For industrial or custom applications, see
👉 custom lithium battery solutions
Part 7. DIY 18650 battery pack FAQs (build, safety and lifespan)
How to build a rechargeable battery pack with 18650 cells?
Design the pack first (voltage + capacity), connect cells in series/parallel, use spot welding, add a BMS, then test voltage and capacity.
Is spot welding necessary for DIY 18650 battery pack?
Yes. Spot welding avoids overheating cells, making it safer and more reliable than soldering.
What is the lifespan of a 18650 battery pack?
Typically 300–500 cycles or 2–5 years, depending on usage, temperature, and charging habits.
Can I mix different 18650 batteries in one pack?
No. Mixing cells leads to imbalance, overheating, and reduced lifespan.
What is the safest way to build a 18650 pack?
Use matched cells, install a proper BMS, follow wiring diagrams, and test thoroughly before use.
Related Tags:

More Articles
How to Choose the Right 3S LiPo Battery 5000mAh for Your RC Hobby Projects?
Learn how to choose the best 3S LiPo battery 5000mAh for RC cars, drones, boats, and planes. Compare C ratings, runtime, connectors, charging, and safety tips.
Comparing Semi Truck Batteries vs. Truck Batteries
Compare semi truck batteries and truck batteries by size, CCA, lifespan, and battery type. Learn how to choose the right truck battery for your vehicle.
Top 10 Flat Lithium Ion Battery Options for Compact Devices
Explore top flat lithium ion battery options, key specifications, and selection factors for compact electronics, medical devices, and energy storage systems.
Top 10 High Capacity Batteries: Best Large Capacity Battery Options
Compare 10 high capacity batteries for portable devices, backup systems, and industrial use. Find the best large capacity battery.
Top 10 Deep Cycle Lithium Battery 2026
Not all lithium batteries are equal. We tested 10 options to reveal the best lithium deep cycle battery for RV, solar, and backup power systems.